Showing posts with label dessert. Show all posts

Monday, April 18, 2011

Vegan Peanut Butter Cookies for Japan!


In my do-gooder ways, I recently participated in Katie's bake sale fundraiser for Japan. To benefit Japan, she generously hosted an online bake sale, in which various participants (like me!) baked up vegan treats for bidders, with all proceeds going to Japan! I was more than excited to help out, and we managed to raise over $2500!

Totally awesome (did I just say that? Yes, I did!)! I volunteered with vegan peanut butter cookies, made with the following recipe. I really hope that the winner of my treats enjoys them! They are so easy, I thought I'd share!

1 cup peanut butter
1 cup wheat flour
1 tsp baking soda
1/2 cup sugar
1/2 cup water
sprinkle of sea salt

Preheat oven to 350. Blend together the peanut butter, sugar, water, and salt until smooth. Add flour and baking soda. Once they are well mixed, roll into small balls (or larger, depending on how big you want your cookies), and place onto a greased cookie sheet. Press down with a fork. Bake until edges are slightly brown (about 15 minutes). Allow to cool, and enjoy!!

Sunday, April 10, 2011

Breaking Up is Hard to Do

Um, we broke Lent. And let me tell you, it was wonderful!

After an extremely tough week of sleep deprivation and stress (causing said deprivation), we had had enough. On Friday evening, we went to my favorite restaurant, Cafe Chloe, which is a little French bistro downtown with some of the best French fare that I've had in the States.


Break it we did. We started with happy hour special wines and two happy hour appetizer specials: scrumptious carrot and coconut soup, and their amazing macaroni with bleu cheese and pancetta. The plan was to "see where we were" after we had our appetizers, but we both knew what was going to happen. Before we knew it (and no blaming it on the booze), we were ordering steak frites for my husband, and I had the la lapin (rabbit! aigh! I know! Too heartbreaking to ever do again!).

Source

Since the damage was already done, so to speak, we were ordering dessert. Dang it, I had been denied for long enough! We ordered my very favorite bread pudding, the yummy pistachio bread pudding with an espresso caramel sauce, served with homemade vanilla ice cream! I'm a bread pudding lover, and this one is the tops.

I'm really glad that we did this, and we learned a lot (to be written up tomorrow -- stay tuned!), but man, it was really hard, and I'm really glad that it's (kind of) over.

Sunday, March 6, 2011

Super secret ingredient brownies!


I love brownies. Growing up, they were my mother's go-to dessert, and I remember helping her prepare more of those Duncan Hines boxed mixes than I could count. In college, I continued my mother's tradition of always having a box of brownie mix on hand for a quick and easy dessert. So easy -- dump in the mix, add some eggs and oil, mix, and presto! In 30 minutes, you have brownies.

Not to scare you, but have you ever read the ingredient list or the nutritional content of those mixes? Whoa! It's good that they are so yummy, because man! The calories! The sugar!

It's true, making a batch of brownies that are reasonably healthy and delicious is quite a challenge. I found that using dark chocolate, wheat flour, and just enough butter to give it that salty-sweet flavor made for a tasty and somewhat guiltless brownie (I know, those words should never be strung together...but I just did). The secret ingredient? Dates. Yes, dates. Their texture and brown sugary flavor was the perfect replacement to reduce both the butter and sugar content. The result? A cake-y, somewhat chewy brownie that will satisfy my brownie craving!

Yield is 9 large or 18 small brownies.

Ingredients:
1/2 cup dark chocolate chips
2 tbsp butter
3 tbsp cocoa powder
1/2 cup date butter (store bought or homemade)
1 tsp instant espresso
1 tsp warm water
3 eggs
1 tsp vanilla extract
1/2 tsp salt
1/2 cup sugar
1 cup whole wheat pastry flour
1/4 cup chocolate chips (optional)
1/4 cup chopped walnuts (optional)

Preheat the oven to 350 degrees.


Using the double broiler method, melt the butter and chocolate together, making sure to stir to keep from scorching.


While that's going, whisk together the eggs, sugar, vanilla, and salt. Add the melted chocolate/butter, and combine. Mix in the date butter and cocoa powder.

In a small bowl, combine the water and espresso powder until well mixed, then add the mixture to the other ingredients.


Add the flour, and mix in, taking care not to overmix. Spray and flour a 9 x 9 pan, and pour in the mix. Sprinkle the chocolate chips and nuts, if desired. Bake for 30 minutes, cool completely before cutting. Refrigerate to store.

Monday, February 7, 2011

Homemade Vitatop Chocolate Muffin Tops!


After hearing about them for over a year, I finally decided to purchase a small box of Vitalicious Muffin Tops. In the mood for a treat, of course I chose chocolate! The other flavors sound yummy, but the selection in the store was pretty limited. I was pleasantly surprised by the softness and flavor, surely food worthy of a low-calorie, healthy dessert. However, the price tag was not so impressive. $4 on sale for 4 muffins? I knew that if I wanted to continue to enjoy these treats, I would have to figure out a way to make them, and so I set to work. I managed to get this low-calorie, similar recipe. It's lower in fiber than the Vitatops, but very good and so much cheaper! The cost of making this recipe, which yields about 8 muffin tops, was $1. Nice!

Ingredients:

1 cup whole wheat flour
1 cup unsweetened cocoa
1/3 cup sucanat
1/2 tsp baking powder
1/2 tsp baking soda
pinch salt
1 egg
1/4 cup natural applesauce
1 tsp vanilla extract
1/4 cup milk
1/2 tsp apple cider vinegar
1/2 cup water
1/2 cup chocolate chips

Preheat oven to 350. In a medium bowl, mix together the flour, cocoa, sucanat, baking powder, baking soda, and salt. In another bowl, mix together the rest of the ingredients except the chocolate chips.

Once the wet ingredients are mixed smooth, add to the dry ingredients and mix until well combined, taking care not to overmix. Mix in 1/4 cup of the chips.


Line a cookie sheet with wax paper or a silicone baking mat (I love, love these!) and using a large spoon, ladle the mix onto the sheet into larg-ish circles. Sprinkle a few chips on the top of each muffin top, then bake for 10 minutes.
Place aluminum foil on top of the cooling muffin tops for ten minutes, then enjoy, or place into small freezer bags and freeze until ready to enjoy.


Monday, January 10, 2011

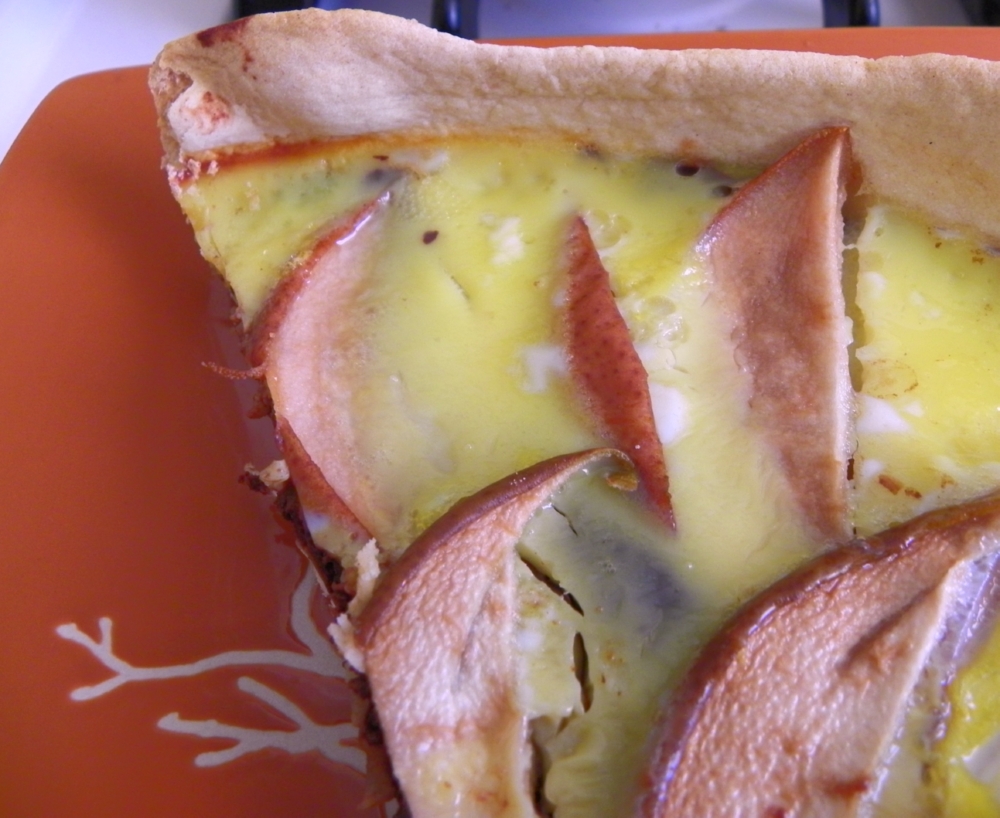
Pear & Chocolate Tart


Unusual combination, no? I have to admit, I did not think of this flavor combination -- when my husband and I were in Paris last fall, we had a wonderful tart with these elements. Then, when I came home, I discovered that pear and chocolate tarts are actually a pretty typical French dessert!

Having an abundance of pears from some Christmas fruit, I wanted to put them to good use. This tart isn't an exact replica of what we had, but it tastes similar to what I remember.There are a few steps to this tart, but it is not terribly difficult.


Ingredients:
1 large pear
1 1/4 cup semi-sweet chocolate chips (or whatever chocolate you have)
2 eggs
2 tbsp sugar
1/2 cup whole milk

Preheat the oven to 400 degrees, and roll out the pie crust, poking holes with a fork.


Melt the chocolate using the double-broiler method, or melt it slowly in the microwave (I always scorch it in the microwave, so I just do it on the stove!). To do a double-broiler if your a terrible microwaver like me, boil water in a saucepan, and place a bowl with the chocolate chips on top, stirring intermittently. Remove as soon as melted!

While your chocolate is melting, chop the pear into slices. 


Once the chocolate is melted, spread it over the bottom of the pie crust. Arrange the sliced pear over the chocolate, making a circular pattern (very important to taste!).


Finally, whisk the sugar, eggs, and milk together until well-mixed. Pour onto the pears. 

Bake for 30 minutes, until custard has set. Serve chilled or at room temperature.  


Saturday, January 8, 2011

Basic Homemade Pie Crust

I've never really understood the phrase "easy as pie." In my experience, pie is one of the most difficult things to bake. One must make or obtain the pie crust, mix up ingredients, throw it all together and then make sure that everything goes off as planned (no falling custards or over-sweetened pies). It is easy, I admit, to simply go to the grocery and pay far too much for a pre-made crust laden with hydrogenated oils of unpronounceable ingredients that are already rolled out and ready to go.

But making your own crust is really not terribly difficult, and think how impressed your friends will be when you tell them that you made your own pie crust from scratch -- from 4 ingredients! Really, that's it. And these crusts will keep for weeks in the fridge, so a pie for a work party this week, something else the next! I went ahead and wrote this as a double batch, because I usually like to make two at a time, even if I'm not doing a double crust pie. I use the extra crust for quiche on a Saturday breakfast.

Ingredients:
2 1/2 cups unbleached, all-purpose flour
1 cup (2 sticks) butter (you could probably use margarine if you prefer)
1/4 cup plain vodka (yes, vodka -- it won't taste like alcohol once it bakes, trust me)
1/4 cup cold water


Pour the flour into a large bowl, then cut in the butter. Mix until very mealy and butter is evenly distributed. Next, dump in the water and vodka, mixing until the dough pulls away from the sides and forms a blob (it's a technical term).


On a cutting board, divide the dough into two balls, then cover with plastic wrap. Refrigerate for at least two hours. I usually do overnight.

When ready to use, roll out very thin (this is the hardest part!), and place into your pie pan, poking with a fork a few times. Fill with your chosen filling and bake! (Hopefully you're better at rolling the dough than me!)

Sunday, January 2, 2011

Everyone Loves Blondies


Blondies are one of my favorite homemade treats. I never buy them from bake shops --- they want to mess with them too much, adding candied fruit, coconut, and other things that simply do not belong. It does stand to reason that there is great argument over what constitutes a blondie, as most seem to think that they are a blond brownie, with butterscotch chips and no cocoa added. For me, blondies are essentially a softer, gooey chocolate chip cookie that is far simpler to create than the CCC. However, if you feel that butterscotch chips are the way to go, by all means feel free to sub them in this recipe. This could easily be made gluten-free using GF flour and oatmeal.

Recipe yields approximately 9 large squares.   Adapted from How to Cook Everything

Ingredients:
1 cup all-purpose flour
1/2 cup light brown sugar or Sucanat
1/2 cup (1 stick) butter or Earth Balance
1 large egg
1 tsp vanilla extract
Pinch salt
1/3-1/2 cup chocolate chips (or butterscotch)

Preheat the oven to 350 degrees.


Melt the butter in a saucepan over low heat (or microwave if you prefer).


Combine with the sugar, and mix until smooth. Add the eggs and vanilla, then slowly add the flour. After all are combined and the mixture smooth, stir in the chips.


Spray an 8x8 baking dish, then spoon in the batter, patting it smooth. Bake for 25 minutes. Allow to cool for a few minutes before cutting. Serve warm (but still awesome the next day!)

Saturday, November 27, 2010

Pumpkin Pie!


What's Thanksgiving without pumpkin pie? We spent Thanksgiving with some generous friends that kindly did all of the big cooking, but I was assigned to bring pumpkin pie and dinner rolls (recipe to come). I searched the web for some good ideas, wanting to be semi-healthy with my offerings this year. I'm not sure how healthy my pie was, but it was absolutely incredible! I wanted to share these awesome recipes with my readers.


First, the crust. I wanted a whole wheat crust, as I've been trying to incorporate more whole grains into our diet, and I figured that the crust could be improved by the rich taste of whole wheat flour. It was a great bet, because this crust was fabulous! Crispy and almost cookie-like, the crust was as wonderful as the filling!


Crust recipe adapted from Chef in You


Crust
2/3 cup Oat flour (I ground up old-fashioned rolled oats to make it!)
1/3 cup whole wheat flour
1/3 cup unbleached all-purpose flour
2 tbsp dark brown sugar, tightly packed
3/4 tsp ground cinnamon
1/4 tsp salt
6 tbsp cold unsalted butter
3-4 tbsp cold milk


Mix together the flours, sugar, cinnamon and salt in a medium bowl. Cut the butter unto small cubes and using the fingers – work into the dough until it resembles unevenly like bread crumbs. Slowly sprinkle in the milk, mix into the dough until it becomes cohesive. You know its just right when the dough holds together and does not seem dry or crumbly. Wrap it in plastic and refrigerate it overnight or for up to 3 days. About 30 minutes before ready to make the pie, remove from the fridge and let it come to room temperature. Preheat the Oven to 425F. On a floured surface, roll out the dough using a rolling pin- to about 12 inch circle. It might crack a bit around the edges, but patch it up, its fine. Transfer the dough to a 9 inch (that’s at least 1-1/4 inches deep).  Trim and crimp the edges. Chill the crust until ready to use.


Filling
For the filling, I did this amazing molasses pumpkin pie recipe. Va-va-voom! So rich and satisfying; I think that everyone had huge pieces and seconds.  


1/2 cup brown sugar
1/3 cup white sugar
1/2 tsp cinnamon
pinch each of allspice, cloves and ginger
1/2 tsp salt
1 1/2 cup pumpkin
2 Tbl molasses
1 tsp vanilla
2 large eggs
1 cup evaporated milk
chopped pecans, optional
Preheat the oven to 425 degrees Combine sugars, flour, spices and salt in a large bowl.  Add the pumpkin, molasses, vanilla,  and eggs. Pour in the evaporated milk.
Pour batter into chilled pie crust and bake for 10 minutes.
Reduce oven heat to 350 degrees and bake for another 45  to 50 minutes.  The middle should be set, with no liquid.
Sprinkle with chopped pecans to cover the crack in the center ;)

Whipped Topping
Adding cinnamon really completes the taste!!!
1/2 cup heavy whipping cream
1/4 cup powdered sugar, more to taste
1/2 tsp cinnamon

Using an electric mixer, beat the cream until thickened. Add sugar and cinnamon. Continue to beat until consistency is fluffy and light. Serve chilled on top of pie!

Wednesday, May 12, 2010

PB & J cupcakes


When I was little, my grandmother made this peanut butter snack cake that was bursting with peanut flavor had perfect texture and crumb. She'd bake it in an 8 X 8 dish, then cut it into squares and serve without frosting, sometimes as a casual dessert, or as an after-school snack. I've always loved peanut butter cakes, but I've never been able to duplicate the texture or flavor of that cake. These cupcakes are not an exact match, but they're pretty close. I've fancied them up a bit to include another childhood taste by adding homemade strawberry jam and a simple peanut butter buttercream frosting. I love putting fruit filling into cakes, and unfrosted, they look a bit like tarts, and reminded me of Alice in Wonderland, so I left a couple unfrosted just to mix it up. These cupcakes are delicious any way that you decide to dress them up. They take a bit of time to construct, but are easy enough for even a novice baker.  Recipe for the jam can be found on this blog.

Ingredients:

For the cupcakes:
1/2 cup all-purpose flour (I used white whole wheat, but plain white would be fine)
1/4 cup brown sugar (packed)
1/4 cup milk (I used almond, but soy or regular would work as well)
1/4 cup peanut butter
1 very ripe banana
1 egg
1/4 tsp baking powder
1/4 tsp baking soda

For the frosting:
1/4 cup peanut butter
1/4 cup milk
1/4 cup unsalted butter (softened)
2 tbsp powdered sugar (or more to taste)

For the filling:
Strawberry jam, homemade or purchased

Yield 8 cupcakes.

Preheat oven to 350 degrees, and line a muffin tin with 8 cupcake papers.

Cupcakes:
In a bowl, mash the banana until it is very mushy, then add the peanut butter, egg, milk, and brown sugar. Mix well.


Next, add the flour, baking soda, and baking powder, mixing until just combined. Be careful not to overmix; this can yield tough cupcakes.

Once they are well mixed, use a spoon to ladle the mix into the cupcake papers, filling about 3/4.


Bake for 20 minutes, or until a toothpick inserted comes out clean.  Remove from oven and cool in the pan on a cooling rack.


Once the cupcakes are well cooled, using a paring knife, cut a cone out of the top of the cupcake, as shown in the photo.


Ladle the strawberry jam into the cupcake, then replace the top.


Frosting:

In a bowl, whisk together the peanut butter, butter, and milk until smooth. Add in the powdered sugar, until sweetened to taste.


Using a spoon or spatula, generously spread onto the cupcakes as desired.

Friday, April 16, 2010

Magnolia Bakery Cupcakes


Many of you that know me are aware of my fondness for cupcakes. I love their cuteness, their individuality, and their ability to turn into a piece of edible art. I've made many cupcakes in my life, and intend on making more. When my husband and I lived on the East Coast and went to New York often, we would always try cupcakes from one of the many bakeries that specialize in them. My favorite was the vanilla cupcakes from Magnolia Bakery in the West Village, which I've referred to a couple of times in my personal blog. Manhattan is pretty far away from me now, and I was exhilarated to find their recipe on Cupcakes Take the Cake the other day, so I decided to make them!  I made a few adjustments to the recipe, such as reducing it to 12 rather than 24 cupcakes, and make 1/4 of both frosting recipes. I wanted chocolate-frosted and vanilla-frosted cupcakes! I didn't change them much, just used buttermilk instead of regular milk, increased the vanilla, used margarine instead of butter in the cupcakes, and added a bit of espresso to the chocolate frosting to intensify the chocolate taste.

The recipes, as I made them.


Cupcakes:


3/4 cup SR flour

1/2 cup + 2 tablespoons AP flour
1/2 cup (1 stick) margarine
1 cup sugar
2 eggs
1/2 cup buttermilk
1 teaspoon vanilla


Preheat oven to 350 degrees.


Line muffin tins with cupcake papers.


In a small bowl, combine the flours. Set aside.


In a large bowl, on the medium speed of an electric mixer, cream the butter until smooth. Add the sugar gradually and beat until fluffy, about 3 minutes. Add the eggs, one at a time, beating well after each addition. Add the dry ingredients in three parts, alternating with the milk and vanilla. With each addition, beat until the ingredients are incorporated but do not overbeat. Using a rubber spatula, scrape down the batter in the bowl to make sure the ingredients are well blended. Carefully spoon the batter into the cupcake liners, filling them about three-quarters full. Bake for 20-25 minutes, or until a cake tester inserted into the center of the cupcake comes out clean.


Cool the cupcakes in the tins for 15 minutes. Remove from the tins and cool completely on a wire rack before icing.


Vanilla frosting:


1/4 cup unsalted butter
1 1/2 cups powdered sugar
2 tablespoons milk
1/2 teaspoon vanilla


Place the butter in a large mixing bowl. Add 4 cups of the sugar and then the milk and vanilla. On the medium speed of an electric mixer, beat until smooth and creamy, about 3-5 minutes.
Gradually add the remaining sugar, 1 cup at a time, beating well after each addition (about 2 minutes), until the icing is thick enough to be of a good spreading consistency. I added a drop of red food coloring to make them pink!


Chocolate frosting:


1/4 cup + 2 tablespoons unsalted butter
1 1/2 teaspoons milk
1/4 cup chocolate
1/4 teaspoon vanilla
1/2 cup + 1 tablespoon powdered sugar

1/4 teaspoon powdered espresso
1/2 teaspoon water

To melt the chocolate, place in a double boiler over simmering water on low heat for about 5-10 minutes. Stir occasionally until completely smooth and no pieces of chocolate remain. Remove from the heat and let cool for 5-15 minutes, or until lukewarm.


In a large bowl, on the medium speed of an electric mixer, beat the butter until creamy, about 3 minutes. Add the milk carefully and beat until smooth. 


In a small bowl, dissolve the powdered espresso in the water, then mix into the chocolate. Add the chocolate mixture to the butter mixture and beat well, about 2 minutes. Add the vanilla and beat for 3 minutes. Gradually add the sugar and beat on low speed until creamy and of a desired consistency.


Monday, April 12, 2010

Almost-vegan Banana Bread


Not intentionally almost vegan, but I wanted to play with egg substitutes, and I've found that applesauce is the best replacement. This bread could be made completely vegan by substituting soy milk for the buttermilk. This bread whips up very quickly, but takes awhile to bake, so it will take some planning ahead if you plan on serving it at breakfast or brunch. This bread is also low in sugar and high in fiber because of the natural sugars of the bananas and the wheat flour and oatmeal. Dried fruit and nuts would also be excellent additions, if desired.


Dry ingredients:
1 1/2 cups wheat flour
1 1/2 tsp baking powder
1/4 tsp salt
1/4 tsp baking soda
3/4 cup old-fashioned oats (I used Quaker)
1 tsp cinnamon
pinch nutmeg

Wet ingredients:
1/4 cup white sugar
1/4 cup brown sugar
3 bananas, best if very brown
1/3 cup milk, buttermilk, or soy milk
2 tsp vanilla extract
1/2 cup applesauce

cooking spray for the loaf pan

Optional Mix-ins:
1/2 cup chopped walnuts
1/4 cup orange zest
1/2 cup golden raisins
1/2 cup currants
1 cup chocolate chips


Preheat the oven to 350 degrees.


Peel the bananas and place them in a bowl. Using a fork or potato masher, mash the bananas until they are a very thick liquid consistency. Add the remainder of the wet ingredients to the bowl, and stir until they are well mixed.


In a larger bowl, mix all dry ingredients together. Once they are mixed, slowly mix the wet ingredients into the dry ingredients. The batter will be very thick.

Spray a loaf pan with the cooking spray, and pour in the batter. Bake for 50 minutes. Remove from the oven, and cool in the pan on a cooling rack for 15 minutes, then pop it out and let it cool another 15 minutes.


Slice and serve with butter, if desired.